- Home
- About Us
- Recovery Services Individual RecoveryEnterprise RecoveryAdditional Recovery
- Software
- Testimonials
- Locations

Data Recovery (125)
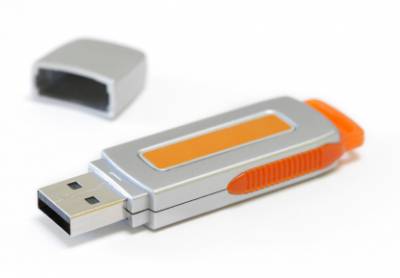
 Nowadays the most compact data carrier is undoubtedly a memory card (SD/MMC/MS and so forth) and USB flash drive. They have emerged relatively recently but have already made a huge breakthrough in development. Just a few years ago the capacity of such device was only 4 to 8 Mb, and today such devices can replace a small hard drive and its capacity reaches several Gigabytes. Though the problems you can face when working with such drives and cards are akin to the ones of HDD. For example, the majority of users have certainly faced the barriers when creating large capacity logical disks (everyone knows about the situation when FAT16 doesn’t allow creating a partition over 2 Gb. We face the same problem when working with flash drives.

Andrei Ivanov has written a remarkable article on data protection (Would you prefer tea with sugar or washing your hands with soap?).
The topic is of interest to me and I have been thinking about writing something similar for a long time.
To make a long story short, there are several levels of data protection and security:
- hardware;
- software;
- and organizational level.
Generally speaking, the division is fairly conventional and later I will provide examples of cross-level solutions.
Hardware level
To prevent hardware malfunctions any component at the hardware level is duplicated. The most common solution for this level is to have two power units and RAID group of several hard drives (arbitrary level, except zero level). This level solutions only help reducing or ruling out downtime caused by server hardware malfunction. That is:
- failure of hard drive ~ RAID controller rebuilds RAID group independently, no need of system administrator involvement. Service users won’t even notice anything.
- a user has deleted file or record in info. system ~ End of story! Hardware level is helpless here.
Solutions like VMware HA or VMware FT entirely refer to this level (especially HA).
Download smartmontools (http://smartmontools.sourceforge.net/)
Execute:
smartctl -a /dev/hda # Check the status
smartctl -t long /dev/hda # Conduct a test
smartctl -l selftest /dev/hda # Allow the test to terminate and see the results
If necessary, use debugfs as written in the article here.
An attempt to delete a file with a size of about 7Tb, hangs the Linux server with the ext4 file system or reiser for several hours.
The solution: The problem is solved when the XFS file system is used.
fuser -k -m /mnt/cdrom - kill the processes wchi are using /mnt/cdrom
umount /mnt/cdrom
If a file was accidentally deleted but it is still opened in any program
(for example is being played in a media player), it can easily be recovered from
file descriptor of the /proc file system
You should insert the drive into the knowingly operable machine (because the problem may not necessarily be in the drive, the controller may be faulty) having enough free drive space to store the whole volume of the failed drive and do the following:
dd if=/dev/hdb1 of=/usr/local/tmp/root_fs.img conv=noerror,sync bs=1024
fsck -y /usr/local/tmp/root_fs.img
mount -o loop /usr/local/tmp/root_fs.img /mnt (in Linux)
After that view /mnt to see what was saved.
Install the utility http://smartmontools.sourceforge.net/
Display the information whether the drive supports S.M.A.R.T.
$ smartctl -i /dev/rdsk/c0t0d0s0
Enable S.M.A.R.T., if disabled.
$ smartctl -s on /dev/rdsk/c0t0d0s0
Over the years of work in Dataretrieval.com Data Recovery Lab we have amassed a small collection of myths about data loss and recovery. Some of them are actively spread around on different computer and not really forums; so we hope this article will be useful to those seeking help when the drive failed or data is lost. So, a posting about how NOT to make a difficult situation even worse.
After just the usual system upgrade using aptitude upgrade and system reboot, the connection to the server became unavailable. We connected KVM to it and the screen displayed: error: symbol not found grub_divmod64_full
A fast solution.
1. boot from a LiveCD (that's correct, you can do it in this Data Center…);
2. execute: mount /dev/md2 /mnt; mount /dev/md1 /mnt/boot; mount —bind /dev /mnt/dev; mount —bind /proc /mnt/proc; mount —bind /sys /mnt/sys; chroot /mnt;
- change /dev/md2 to your own root disk device (/);
- change /dev/md1 to your own boot disk device (/boot);
3. grub-mkconfig -o /boot/grub/grub.cfg; grub-install /dev/md1; update-grub;
- change /dev/md1 to your own boot disk device (/boot);
4. reboot.
Copyright © 2025 DataRecoup Recovery Services. All Rights Reserved. Designed by DataRecoup Lab.


