
Adaptec 6405 allows us to set the size of "stripe" from 16KB to 1024KB. It also allows on independent configurate a caching of read and write. As the only one of the three tested solutions, we can protect the cache by using the optional battery. All these qualities are such that in theory is the best option, particulary if no take into account the price. Of course, for the average user, such high model of the RAID controller is not needed, and through the testing of quite high model, we will evaluate how is working compared to other cheaper alternatives.
Data Retrieval in Los Angeles - data recovery | hard drive and raid data recovery
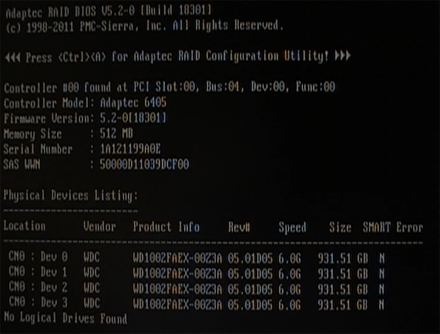
Setting up the most important options of card is done from the level of utility available during boot the computer. Then is initializing and the booting the Adaptec's card. During this time you can use the key combination Ctrl + A to run "Adaptec RAID Configuration Utility". The vast majority of available here options associated to the RAID is also available from within the Windows as "Adaptec Storage Manager". Although it also has several options associated only with thecard, which from the ASM can not be changed.
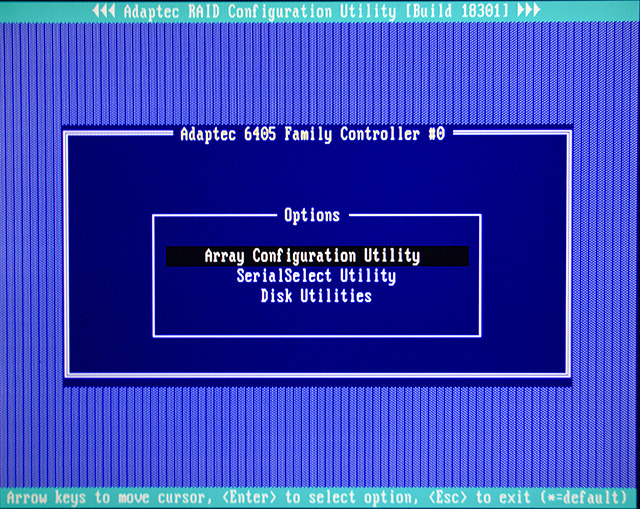
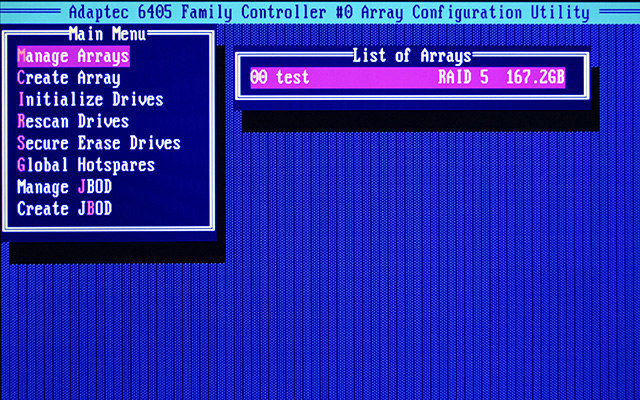
After entering into the Utility, we will see the menu as above.
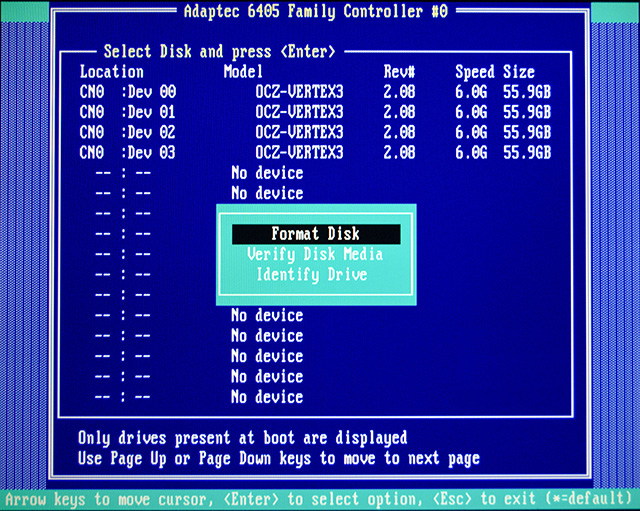
"Disk Utilities" opens for us the menu as above, in which we can format, verify and identify the drives. Last option is concerned with external stores - by connecting a special cable, the suitable warehouse signals the corresponding pocket of drive by LEDs.
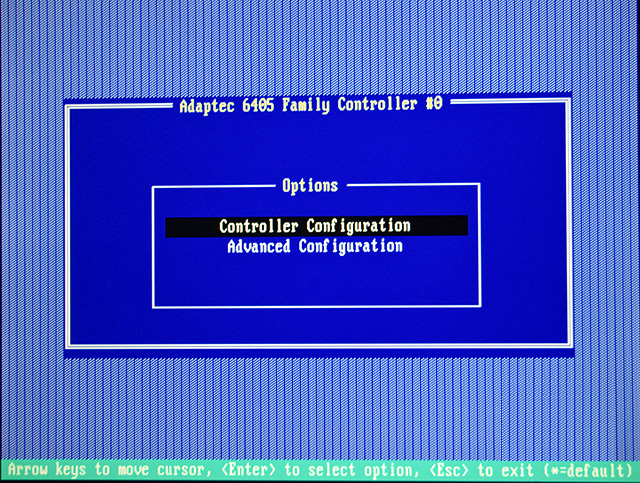
"SerialSelect Utility" opens to us the next submenu, where you can choose the basic and advanced settings for the controller. Some of these settings is possible to define only from the level of this tool.
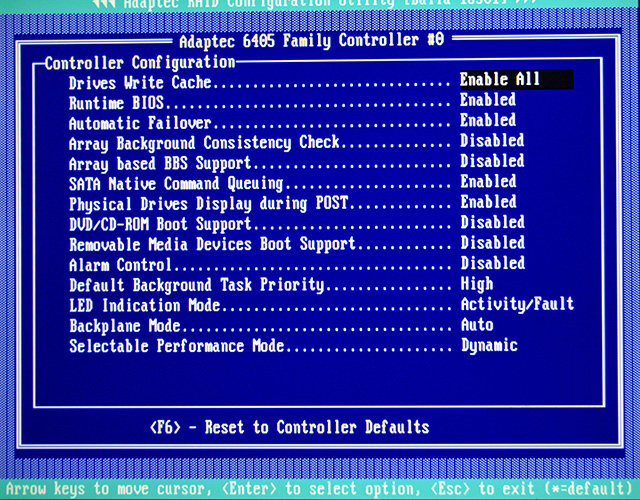
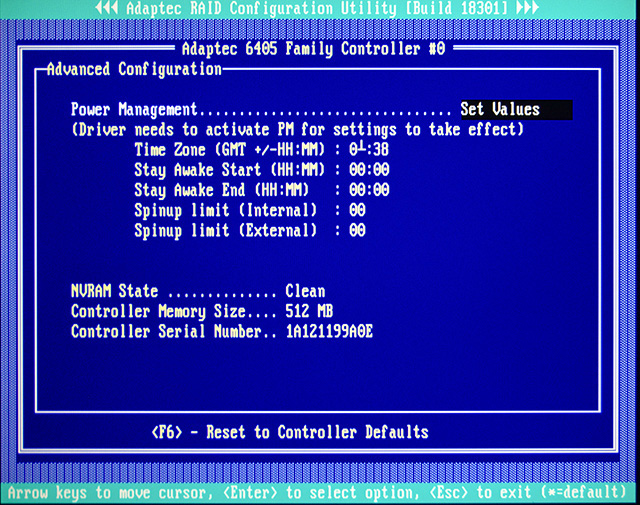
These two pictures are: basic (Controller Configuration) and advanced (Advanced Configuration) controller settings. Once we are acquainted with all the options it's time to create a matrix. For this purpose, the main menu, select "Array Configuration Utility".
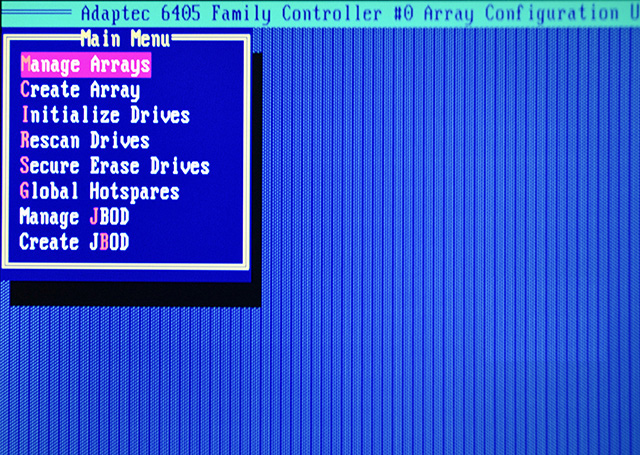
For our eyes will punish the main menu is related to the management of RAID arrays. To create a new matrix, click C or navigate of arrows to the position the "Create Array" and press Enter.
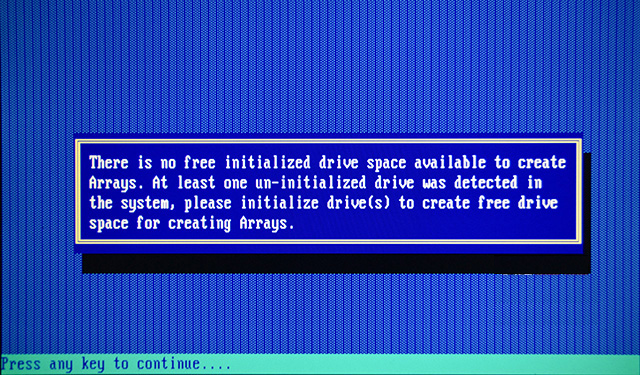
If it is detected at least one uninitialized drive you will be notified. Clicking on any key, will cause withdraw to management menu of array, where this time we choose the position "Initialize Drives" or click I.
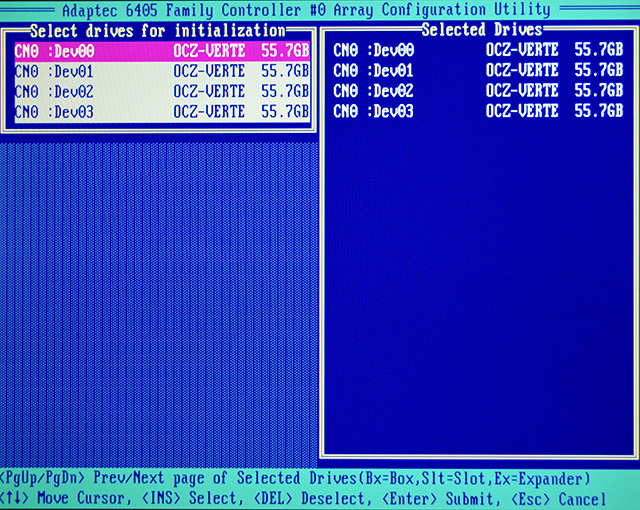
In the new window, select all the uninitialized disks by selecting them with the arrow keys and selecting with the Ins key. After you activate all,press Enter.
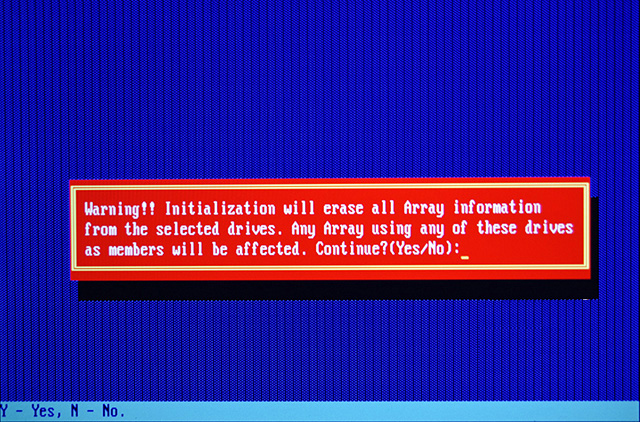
Warning! You will be informed by the communication as above. We confirm by typing Y and click Enter.
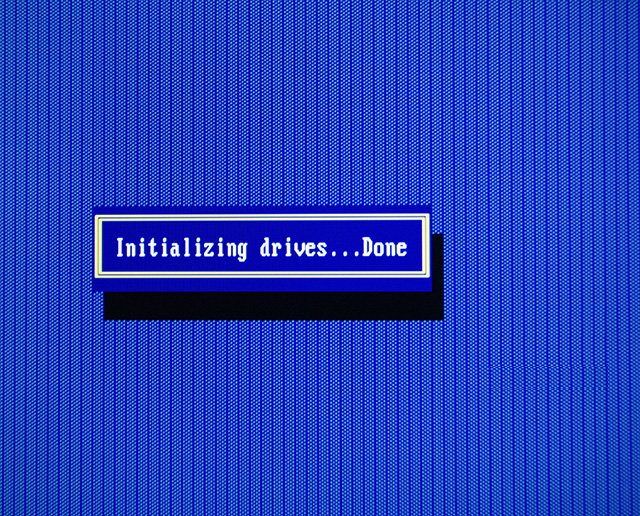
About the success of the initialization, we will notified. Now we return to the menu and again select option of create a matrix "Create Array".
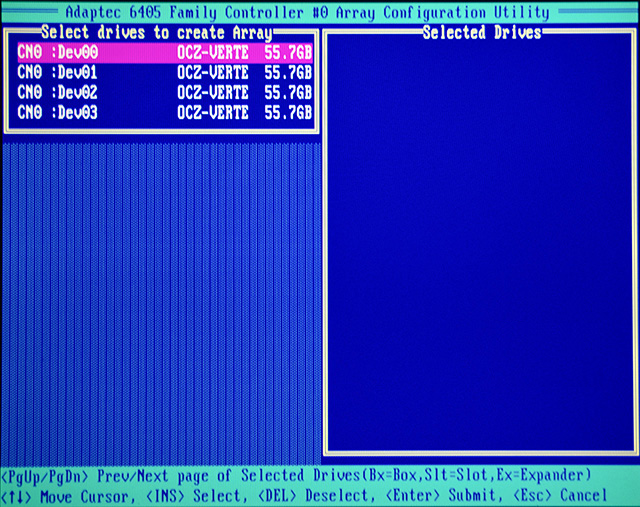
Just as at initialization, we choose the disks and we adding them to the list of selected, by using Ins key...
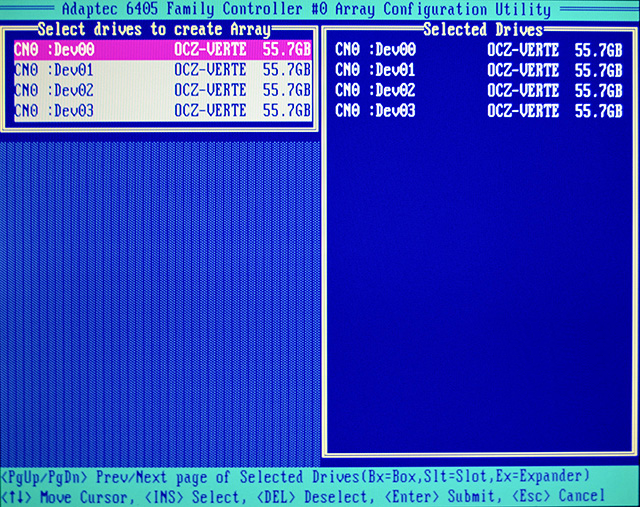
and confirm by Enter
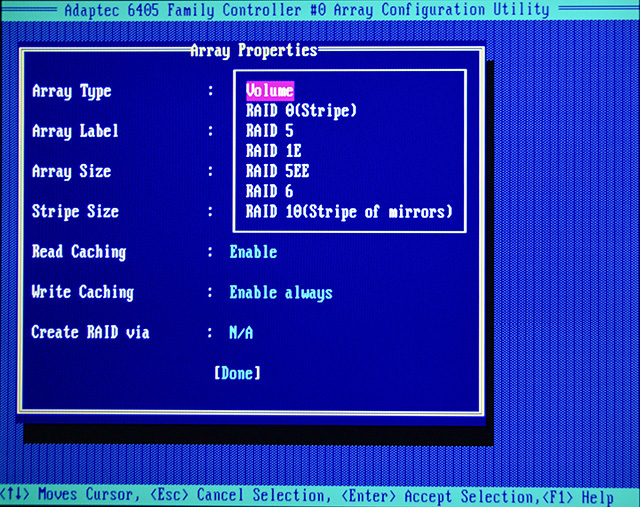
We move between options by key Tab - next field and Shift + Tab - the previous one. Enter key starts edits an item, here "Array Type", where we choose which level of matrix we are interested. Between the options we moving by arrows, by press ESC we cancel selection, and re-click ENTER accepts the changes. In this example we will build the RAID 5 of four drives, so we choose this option. RAID 1 is not listed because it may have on the controller just two disks, and in the previous step, we selected all four. For JBOD is a separate wizard in the main menu.
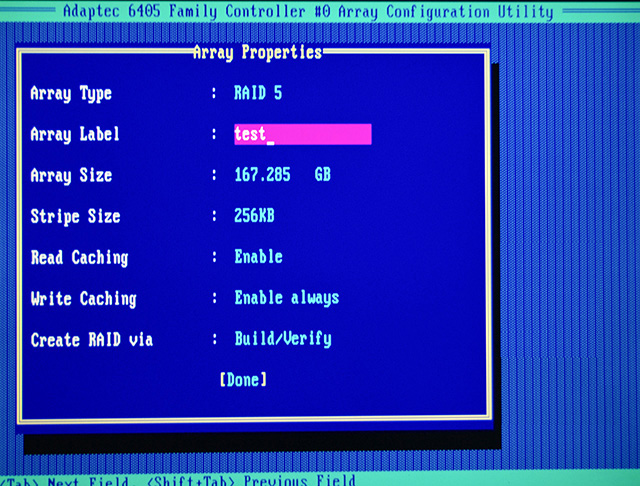
Once approved, the wizard will automatically proceed to the next position. We setup the name of the matrix, in the example is a "test" and then Enter to confirm.

Set the size of the matrix, or simply skip if you want to use up all available space.
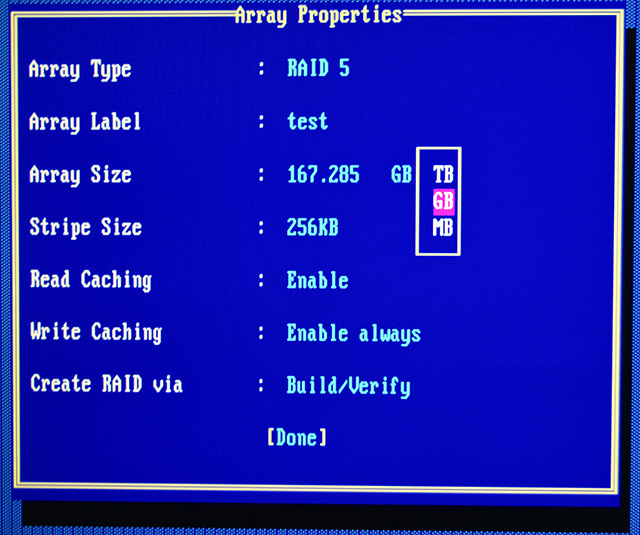
Set the unit of measurement values (defined in the previous step) of size the matrix.
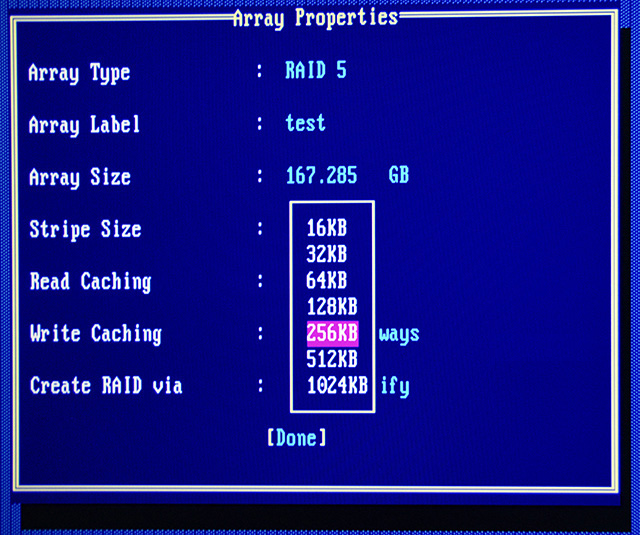
Set the size of the "strip". In example we chose 256KB. When creating a RAID 1, this option is of course not available.
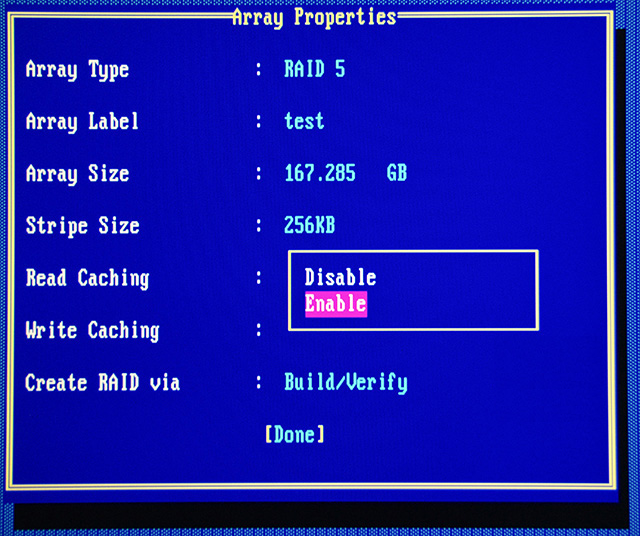
Set the "read caching" as enabled or not.
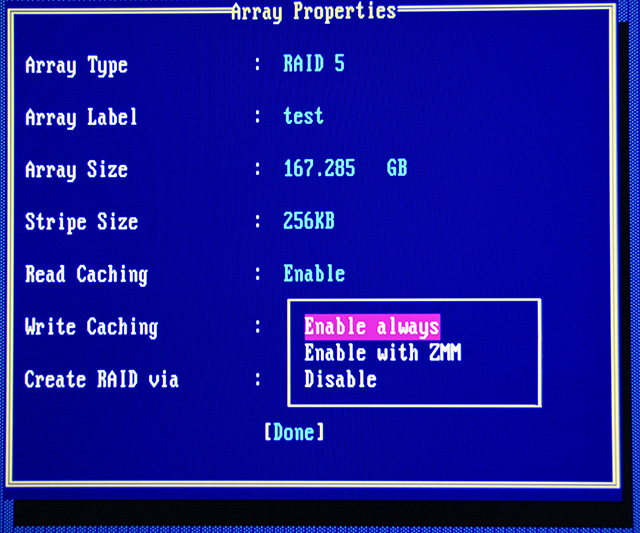
Then we do the same with write buffer. Here, however, there appears a mysterious item "Enable with ZMM". ZMM is a module of backup battery. Selecting this option will cause, that the caching of write will be automatically activated if ZMM module will be detected, and without module the caching will be disabled.
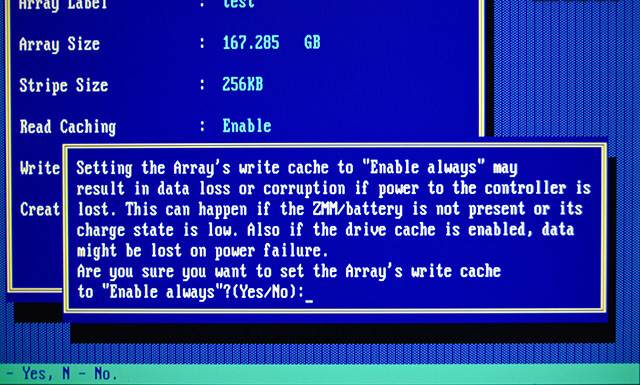
Selecting in the previous step, the position of turned on a buffer, result in displaying the information / confirmation. Enter Y and press Enter.
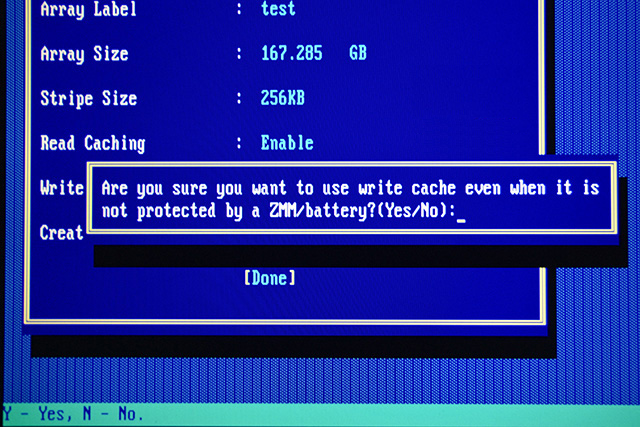
You will be asked again to confirm in case when we do not have ZZM module / battery. Again, type Y and press Enter.
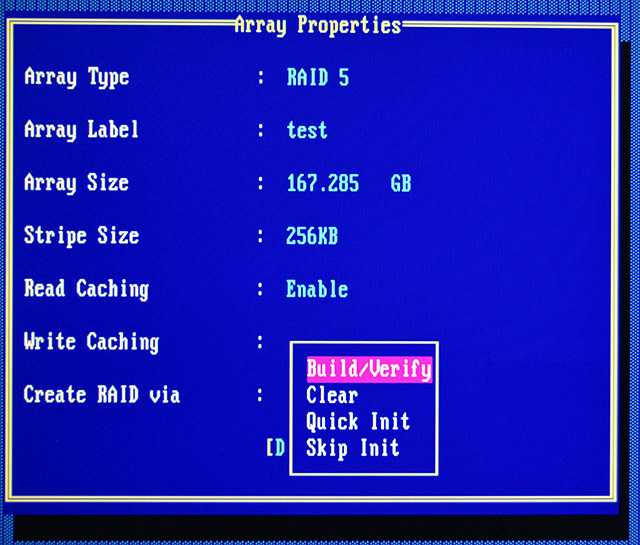
The last step is to choose a method to create a matrix. There are four options: Build / Verify - full array initialization with simultaneous verification of the drives (creating parity / copies of data). The matrix is immediately available, but building the matrix / calculation of parity may compounded the performance. Clear - full initialization, with it that all disks are overwritten by zeros. The lack of the counting of parity (RAID 5, 6) or copying the data (RAID 1) because there is no need. The matrix is unavailable, until the process is over (faster than the Build / Verify). Quick Init - fast initialization. Recommended only for new disks. Skip Init - bypasses the correct initialization, form only meta data associated with the matrix. It may be useful for rescuing data from damaged matrix, where too many drives have died to recovery via usual way.

We can complete the process of creating a matrix.
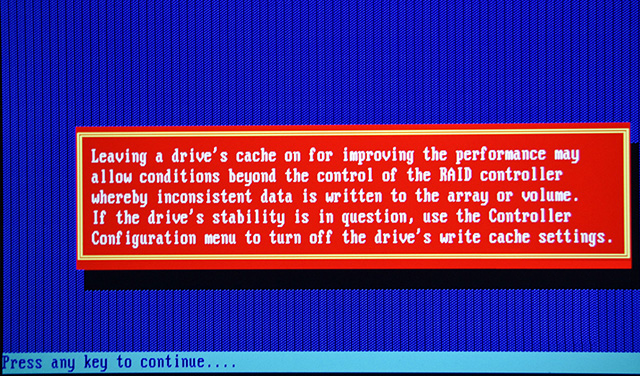
You will be informed that leaving the built-in caching in individual disks can lead to a situation beyond the control of the RAID card, and thus lead to save of incorrect data on the matrix.
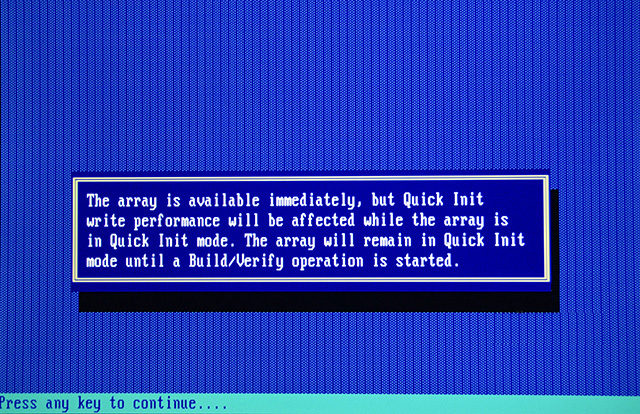
When you select fast initialisation we were notified of a possible slowdown of record the matrix to the time of full process of the construction / verification of the matrix.
Done.The matrixwas created.
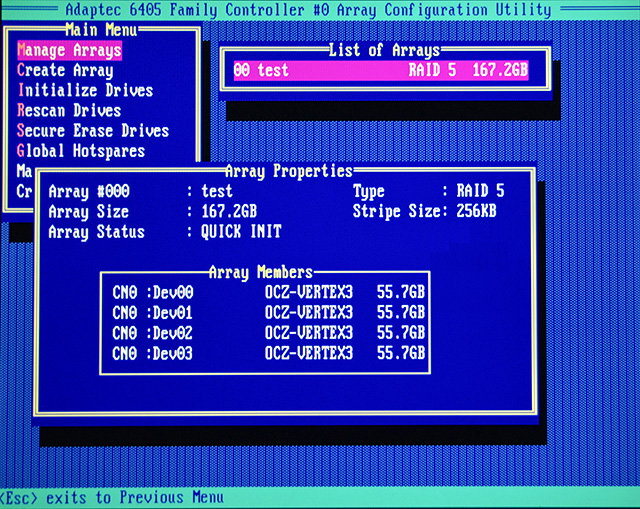
We can check the properties of the newly formed matrix.
More about RAID information recovery
Set up a matrix with the use of this interface allows to create a mixed configuration. We showed how to create a matrix, because it is simply necessary for the construction of the matrix on which you want to install the operating system.

