
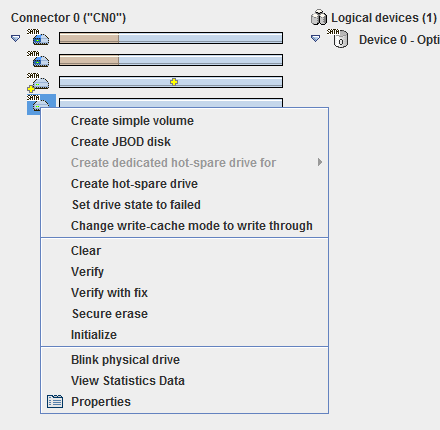
This is a snapshot of what we'll see the context menu when right-clicked on mouse on freedisk unallocated to any array. It is worth noting that the first two discs have at first created RAID 0, it's mean the matrix without redundancy, from that the submenu to create dedicated a spare disc is inactive.Global drive hot-spare (third) is marked of yellow cross.
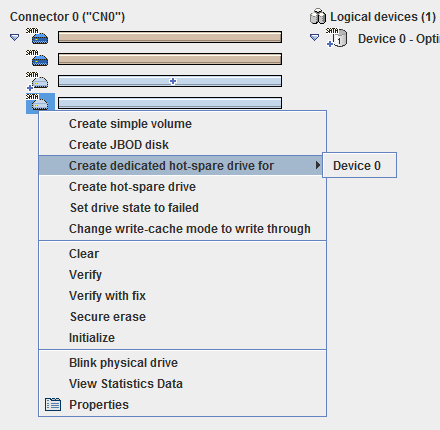
The same context menu, this time with a redundant RAID 1 on the first two drives. As you can see the submenu to create a dedicated hot spare is available. In addition, already assigned to a RAID 1 (RAID 1 recovery) disk with backup (third) is marked with a blue cross.
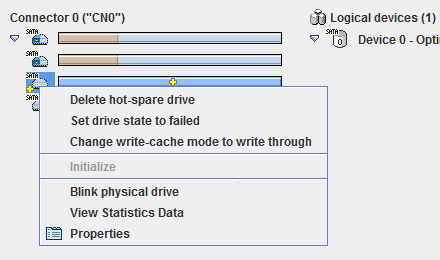
The context menu of the global hot-spare drive.
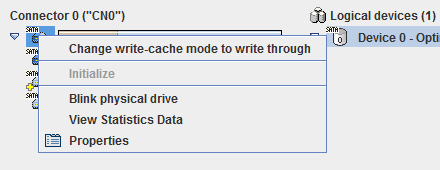
Context menu being a member of a any disk array, in this case RAID 0
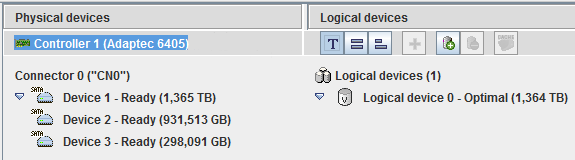
In the window of application, the physical disks connected to the controller can be viewed in three different ways. The above screenshot shows the default text mode. As you can see we are connected to the three different size of disks. On the largest is a usually Windows partition, which was detected by Adaptec as a logical drive.
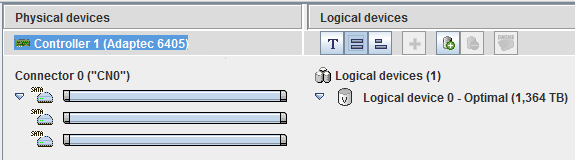
The second mode is full mode. It displays strips of the same length regardless of the real size of every disk.
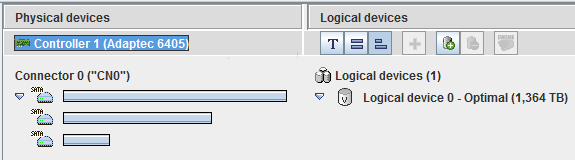
The last third mode is a relative mode. The lengths of bars are proportional to the size of disks.
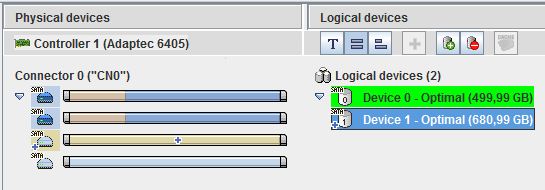
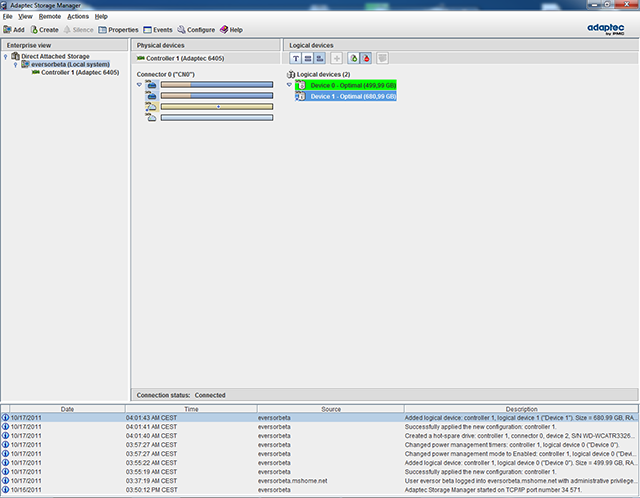
A multitude of colors and markings of information at the beginning can make you dizzy. In the above screenshot, we see four drives. At the beginning of the first two are RAID 0 array. In the list of logical devices, mean arrays, RAID is highlighted in green, because has the defined settings of the power management. The second of currently selected RAID 1 has its own dedicated disk of backup, hence beyond the blue background near icons of disks and a blue piece of drives bars showing the used area, marked of golden color is a hot-spare disc.
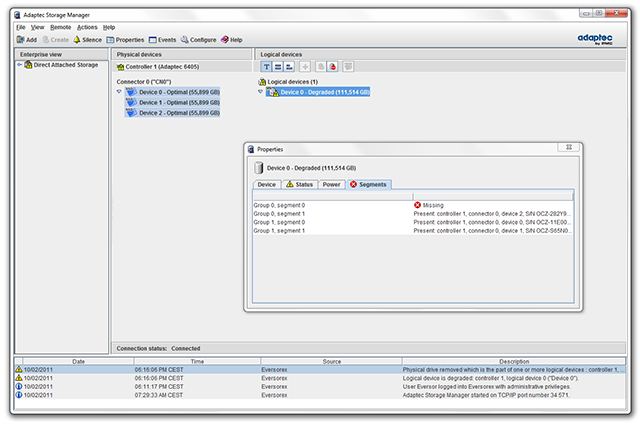
In the above screen shot you can see the properties window opens RAID 10, which is degraded because we disconnected one disk to simulate failure. Such information can also be read from the events listed at the bottom of the application.
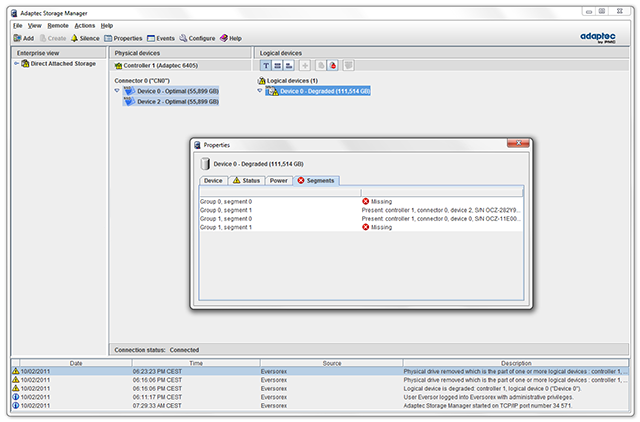
After disconnected the appropriate second drive we have now RAID10 with missing of two disks. The matrix is still operational.

Connect the drives back. The controller detects them, but in the meantime the data has changed on our arrays and disks contain unsynchronized information.
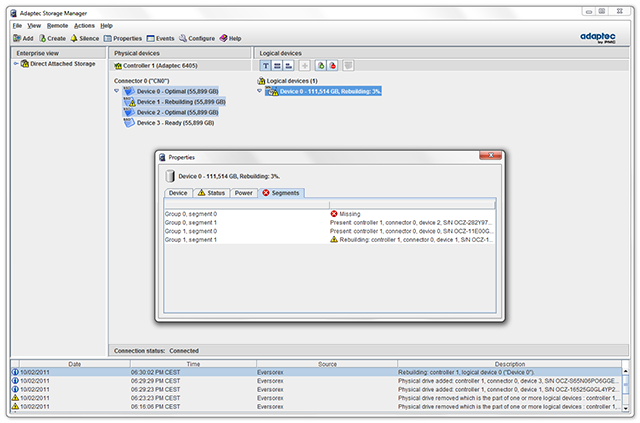
Half a minute later, the controller starts rebuilding the array. One disk at a time.
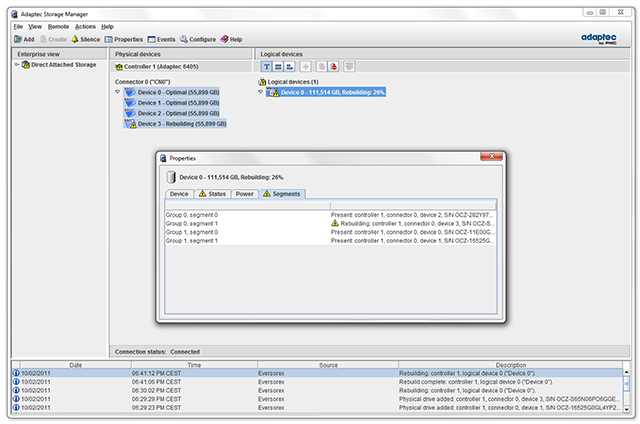
Because that the example is on the SSD, the reconstruction of the first lasted only an 11 minutes. Automatically was started a restoration on the second disk. A dozen minutes later, the drive is rebuilt and the matrix is fully operational.
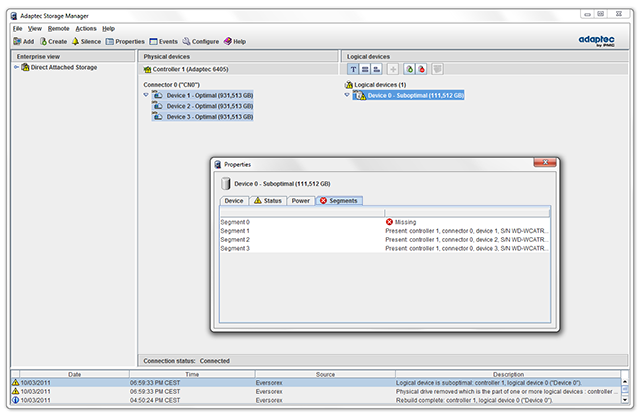
We conduct a similar test for RAID 6, this time on the WD 1TB drives. Removed the first drive and we have the state as above. A matrix with one of missing drive is still not degraded matrix. Its status is suboptimal.
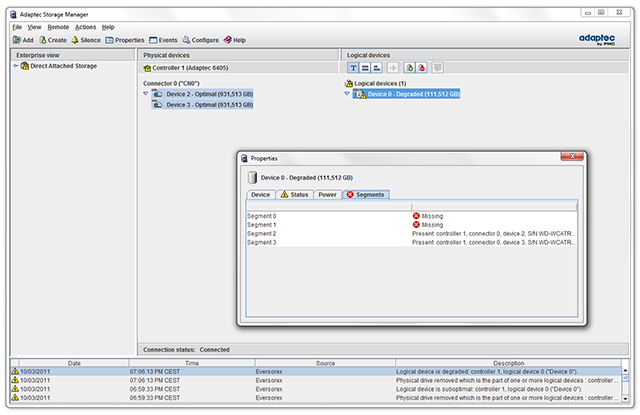
The second disc disconnected. The matrix is degraded.
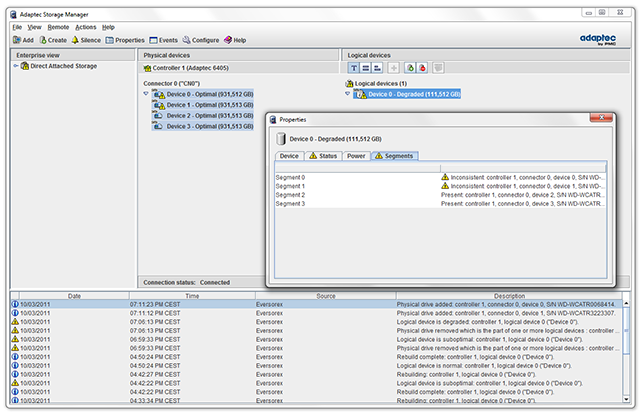
After connecting the drives back we have the same situation as in RAID 10 Both discs are marked as inconsistent, out of sync.
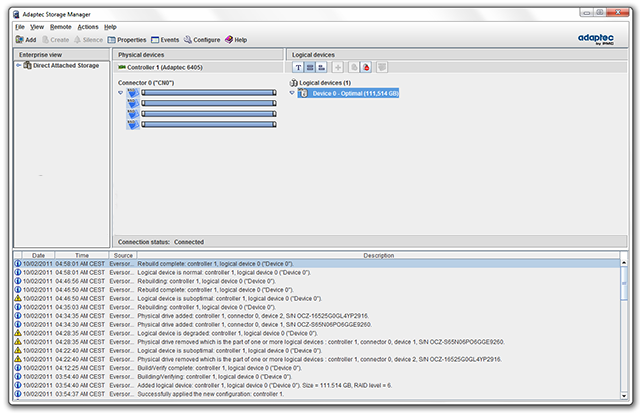
We can notice that this screen shot is slightly deceitful, because the HDD magically was turned into the SSD. Independent from the times of duration the restoration on SSD has taken on both drives is the picture that still shows what he had. Automatically rebuilt the array, about half a minute reaction time before the reconstruction of the first disk (4:34:35 - Detection of the disk, 4:45:03 - start of repair) and less than 10 seconds after the end of rebuilding the first one to start of repair the second disc. These times are the same for classical disks, thus preserved the message of the image above.
Removal of the matrix on the Adaptec controller by using applications ASM comes down to select the RAID you want to delete, then clicking on the icon with a minus in a red circle (as seen in the screenshot is pressed at the time making the dump).

Will pop up one of the two windows. We get information that we cannot remove the matrix because they include created partitions in the system, or get a prompt such as the picture above. We confirm by clicking Yes.
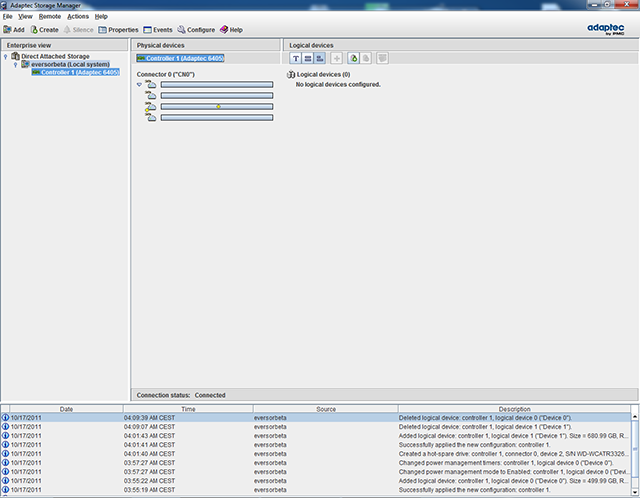
After removal both of RAID, but not removal hot-spare drive, we can see a view of the above screenshot. And that's all regarding removing the matrix using the ASM.
Data Retrieval in Phoenix - raid data recovery and server data recovery services emergency.

