

 .
.
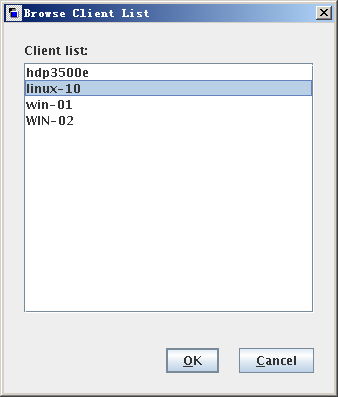
- Click Browse beside Source client for restores. The Browse Client List dialog box is displayed.
- In the Client list area, select the virtual machine that you want to recover and click OK.
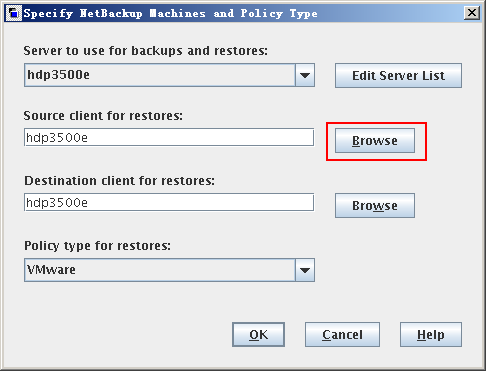
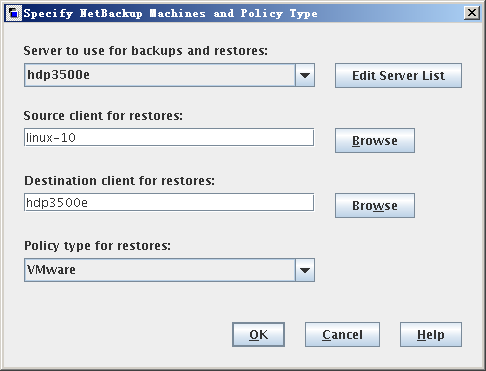
- The Specify NetBackup Machines and Policy Type dialog box is displayed.
- Set Policy type for restore to VMware.
- Click OK. The No Files Found dialog box is displayed.
- You can ignore the message and click OK on the dialog box.
 NOTE:
NOTE:The system looks up the backup image in /root/ by default. So the previous dialog box is displayed sometimes. The backup image will be looked up in follow-up procedures. Therefore, you can ignore the dialog box.
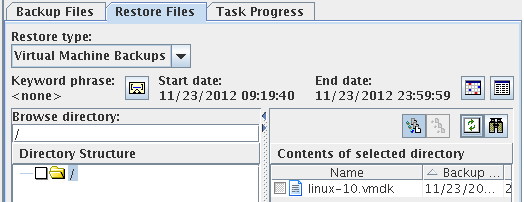
- Set Restore Backups to Virtual Machine Backups.
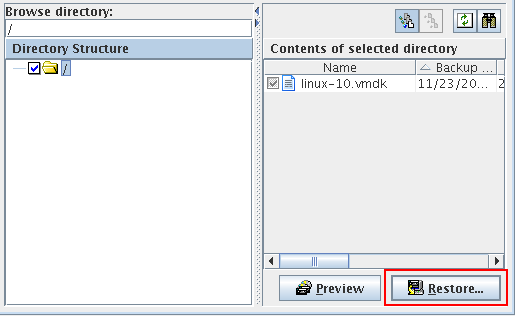
- In the Browse directory input box, enter /. Press Enter. In the Directory Structure area, the image of the latest successful backup is displayed.
- Select the backup image of the full virtual machine.
- Click Restore. The Virtual Machine Recovery: Recovery Destination dialog box is displayed.
- In the Recover virtual machine to area, select Original Location.
- Original Location: Recover the virtual machine to the original location. When you select this option, the virtual machine settings at the backup point in time are used and cannot be modified. The following is an example selecting Original Location.
- lternate Location: Recover the virtual machine to the alternative location. When you select this option, you can modify these settings.
- Click Next. The Virtual Machine Recovery: Recovery Options dialog box is displayed.
- Select a recovery host in NetBackup Recovery Host.
- In the Destination setting area, the virtual machine settings are displayed. These settings apply to the virtual machine when recovery is executed.
- Select a host that executes recovery in NetBackup Recovery Host. You are advised to select a host that performed the backup. If you select a different host as the recovery host, the recovery may be slow or fail.
- In the Transport modes area, select recovery transport mode. For details about transport modes, see Table in Creating a Backup Policy
- Click Next. The Virtual Machine Recovery: Virtual Machine Options dialog box is displayed.
- Select the Virtual Machine Recovery option. Table describes the Virtual Machine Recovery option
- The recovery fails if a virtual machine with the same display name but with a different UUID exists at the target recovery location. You must delete the existing virtual machine and run the recovery, or keep the existing virtual machine and stop recovery attempts.
- If you do not want to keep the existing virtual machine, remove the existing virtual machine, or log in to the ESX server and remove the directory where the virtual machine resides.
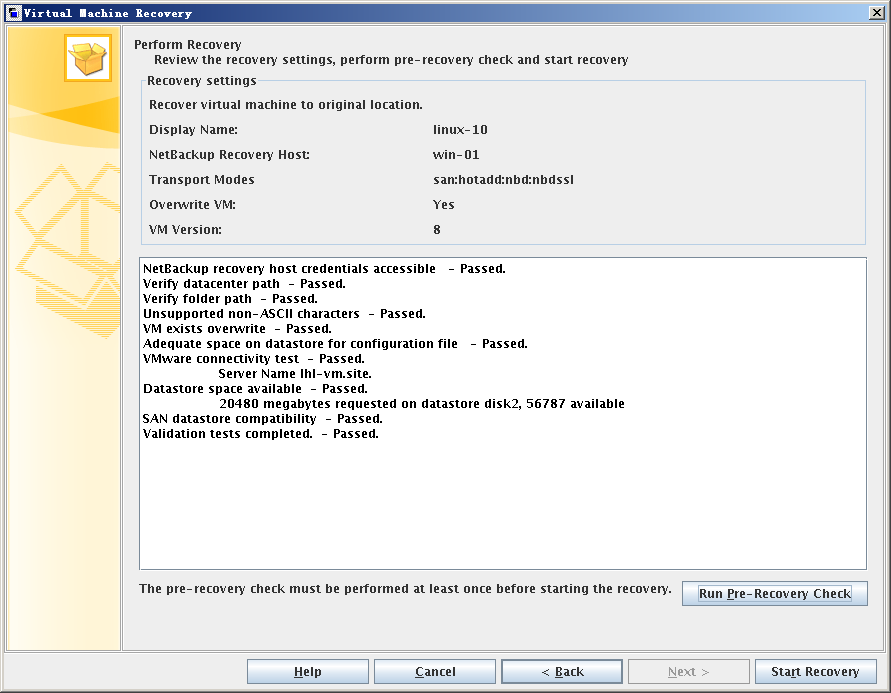
- Click Next. The Virtual Machine Recovery: Perform Recovery dialog box is displayed.
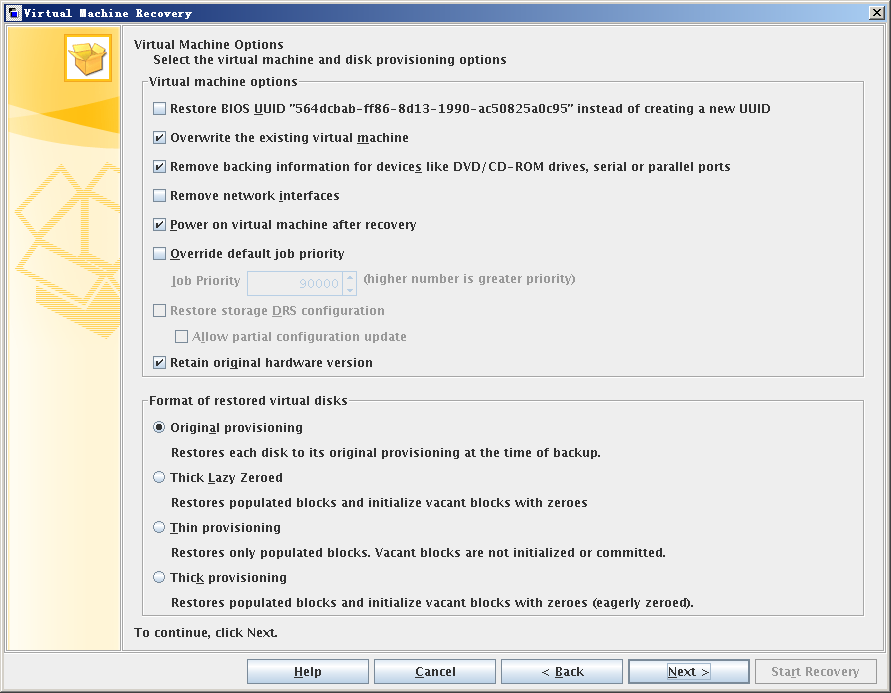
Table 1 Descriptions of the Virtual Machine Recovery option
Option | Description | Recommended Operation |
|---|---|---|
| Recover BIOS UUID xxxx instead of creating a UUID | Retains the UUID of the original virtual machine. The host recovers the virtual machine using the same UUID that the virtual machine had before the recovery. Note the following: | Selected |
| Overwrite the existing virtual machine | If a virtual machine with the same name exists at the destination, the virtual machine must be deleted before the recovery begins. Otherwise, the recovery fails. | Select this option to delete the virtual machine. |
| Remove backing information for devices like DVD/CD-ROM drives, serial or parallel ports | If a virtual machine has a CD-ROM ISO file when the virtual machine was backed up, the ISO file must be available on the target ESX server during the recovery. If the ISO file is not available, the recovery fails. | Select this option if you want to recover the virtual machine without restoring the mounted ISO file when the virtual machine was backed up. |
| Remove network interfaces | Removes all the network interfaces from the recovered virtual machine. | Select this option if network connections on the destination virtual machine are changed after the backup is executed. |
| Power on virtual machine after recovery | Select this option to automatically power on the recovered virtual machine when the recovery is complete. | Selected |
| Override default job priority | Select this option to overwrite the default priority and activate Job Priority to set a higher priority. | Not selected |
| Recover storage DRS configuration | This option recovers the configuration of VMware Distributed Resource Scheduler (DRS) if the DRS is configured for the virtual machine that resides in a DataStore cluster. Examples of DRS configuration are VMDK affinity rules and anti-affinity rules. NOTE: This option is unavailable if the DRS is not configured for the virtual machine that resides in a DataStore cluster. If this option is selected, Allow partial configuration update is activated though other settings cannot be recovered. If problems exist in DRS configuration and this option is not enabled, the NetBackup does not recover any settings of DRS configuration. | Select this option if the DRS is configured for the virtual machine that resides in a DataStore cluster. |
| Retain original hardware version | This option recovers the virtual machine to the original hardware version. The original version is retained though the target ESX server by default uses a later hardware version. If this option is disabled, the recovered virtual machine is converted to the default hardware version that the ESX server uses. | Not selected |
| Original provisioning | Recovers virtual disks of the virtual machine using their original provisioning. | Select Original provisioning. |
| Thick Provision Lazy Zeroed | Configures the recovered virtual disks in the thick format. The virtual disk space is allocated when the disk is created. This option helps recover the filled blocks, but initialize vacant blocks using zeros based on site requirements. | |
| Thick Provision Eager Zeroed | Configures the recovered virtual disks in the thick format. Recovers the filled blocks and immediately initializes vacant blocks with zeros in eager zeroed mode. | |
| Thin Provisioning | Configures the recovered virtual disks in the thin format. Recovers the filled blocks but does not initialize vacant blocks or commit vacant blocks. Thin provisioning saves disk space through dynamic growth of the VMDK file. The VMDK files are not larger than the required space of virtual machine data. The virtual disks automatically increase in capacity based on site requirements. |
The check result is displayed in the middle of the interface.
NOTE:
All the results must be Passed. If some of the results are not Passed, handle the system environment based on the results and check it again. Ensure that all the results are Passed
NOTE:
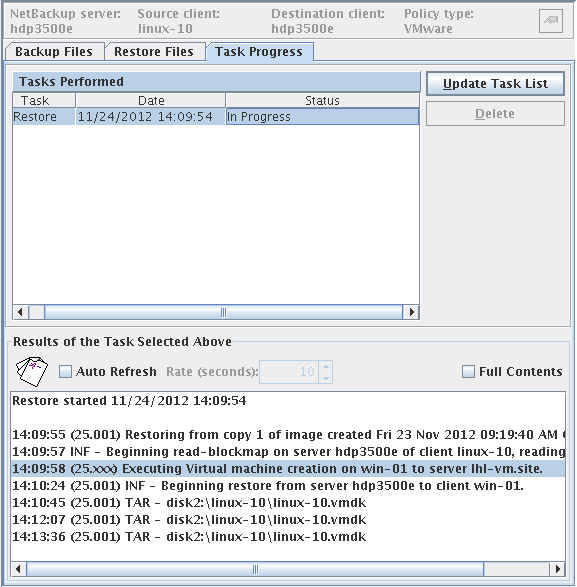
If Error is displayed after the recovery is complete, rectify faults based on the information that is displayed. Start the recovery again.
Follow-up Procedure
If Power on virtual machine after recovery is not selected when the Virtual Machine Recovery option is configured, manually power on the virtual machine after the recovery is complete.
Reference: http://support.huawei.com/enterprise/docinforeader.action?contentId=DOC1000018623&partNo=10092

