
In addition, AMD-RAIDXpert (called interface) allows you to set the bar only 64KB or 128KB, while the Utility you can set even 256KB. Directly in the Utility you can't set no alarms and schedules, we do not have it affect to enable a NCQ. Another difference is no possibilities to repair the matrix from the Utility level.

Let us help you with RAID data recovery in San Jose.
Both tools allow for you to build the mixed matrix as the same like in Windows 7. So we can create a small RAID 0 for the system, and the rest we can use to create the RAID 5 to protect valuable data. Of course to create any kind of RAID in the BIOS of mainboard we have to set up the appropriate configuration options of the disk controllers to the appropriate values. Most often those values are: RAID, and we can set them in the positions of disk controllers with reference: Type or Mode
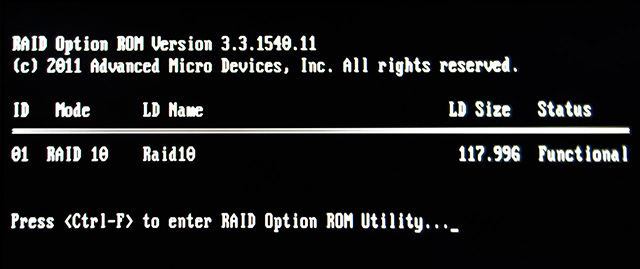
The process of creating a matrix with the use of BIOS's Utility starting from the inclusion (or restart) your computer. At the time when we are greeted by the information of above screen, click on the appropriate key combination. In this case it is Ctrl + F. Information and the key combination will depend of course on mainboard. So please check it into the manual.
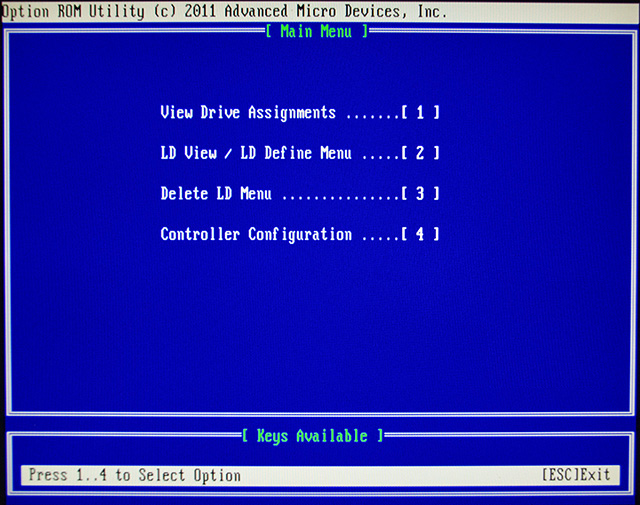
We are greeted by the above menu. Click 2 to enter the submenu of viewing and creating a new matrix of RAID.
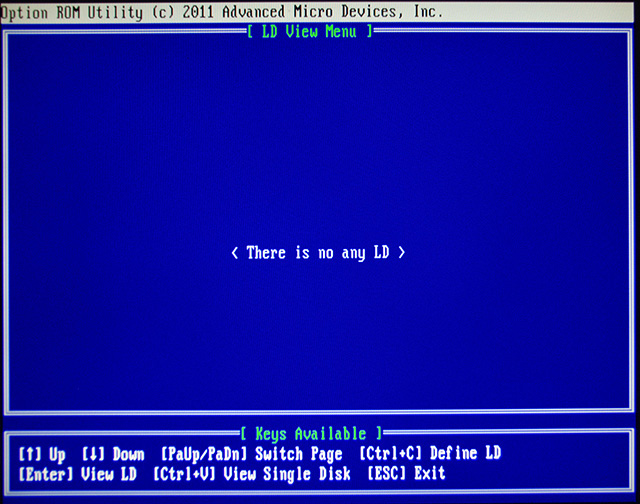
In our case, we haven't any matrix. To move to create a new, click Ctrl + C, which is responsible for causing the submenu to define new matrix (Logical Drive - LD). Again: a method of creating a matrix on other mainboards may vary, you should look in the manual :).
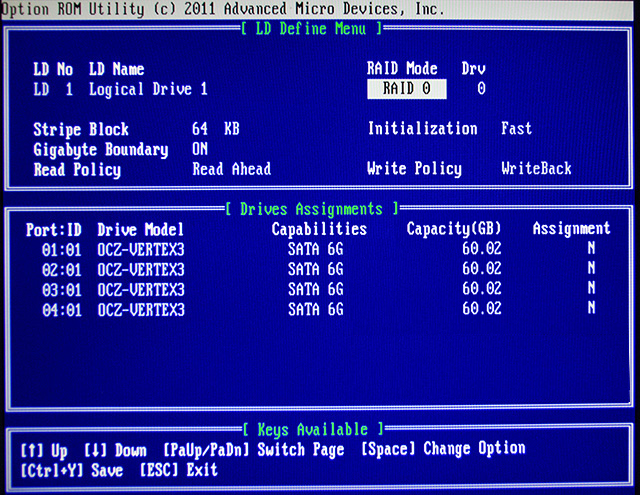
Submenu of create a matrix on our record looks like the picture above. The default option selected is that we can configure our RAID level. We will build on the example of RAID 10 array (RAID 10 recovery). To jumping between options as telling information at the bottom we use the space bar. Among possible to set of the parameters we use the arrow keys move up and down.
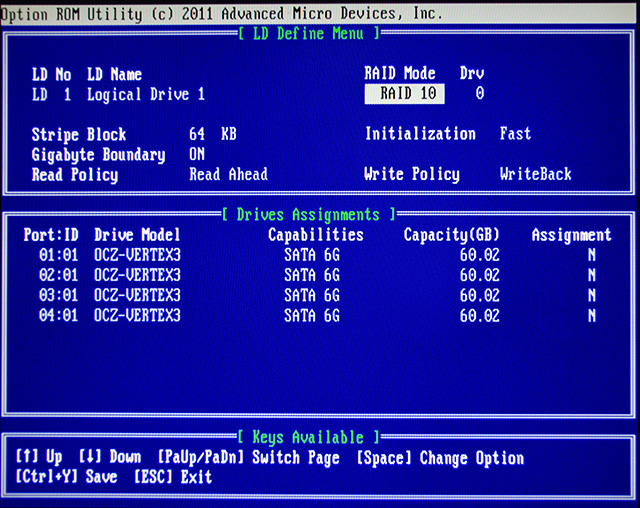
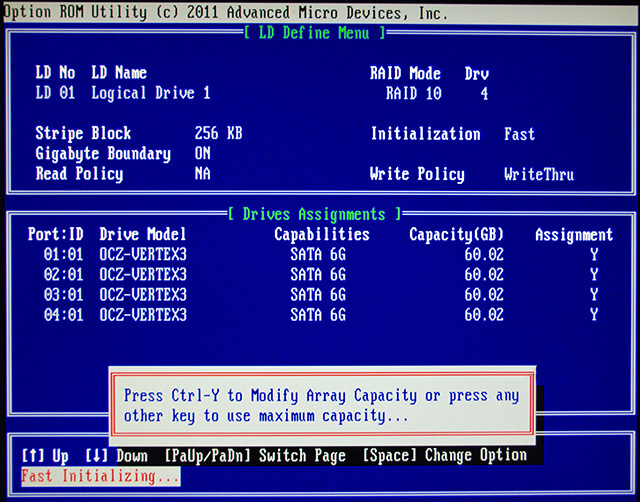
We have already chosen RAID 10 Now it's time to configure other options, and add disks. Click the down arrow.
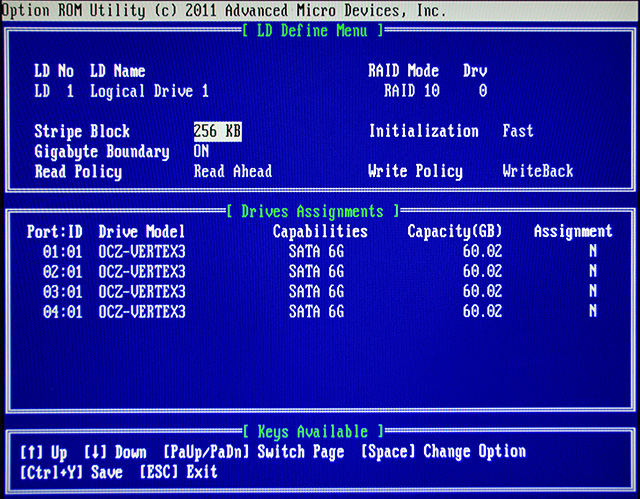
We modify the size of the bar (Stripe Block). We chose 256K because on this option have performed most of the tests.
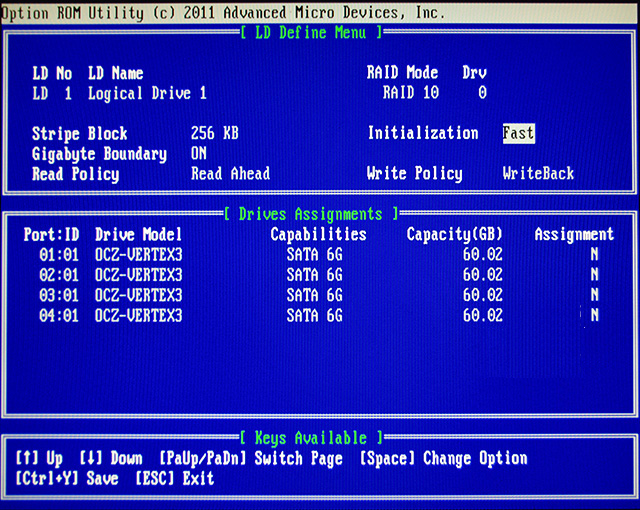
We configure the option associated with the initialization of disks. The default option "Fast" corresponds to the high-speed initialization. "Full" is the full initialization. The difference between them is similar to the difference between formatting a fast and full. A third option is "None" - no initialization. To save time we use the default value. That is accelerated initialization.
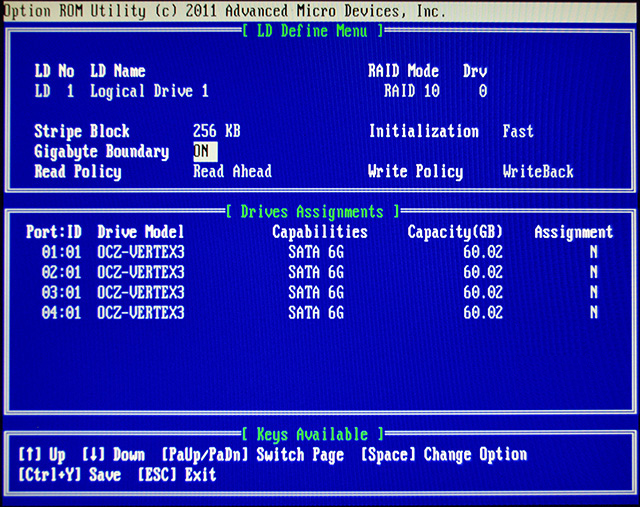
Gigabyte Boundary option is responsible for rounding size of generated matrix to full GB. Default is ON.

Setting of read caching has three possible options. Each of them also automatically change assigned the write cache option. The options are "Read Ahead" - the controller automatically load into the buffer the fully bar, which helps in the statical and sequential types of readings. Worse, if the readings are random and based on a large number of smaller orders than the size of the bar. Cache - full buffering. In theory it should be the golden mean. NA - off caching. Commands I / O goes directly to the disks. The first two options enable a writeback write caching - the controller reports to the system the execution of record as soon as the complete data will done in its cache. The third option disables write caching "WriteThru". Of course, caching unsecured even by battery can result in data loss in case of power failure. In addition for RAID 0 and 10 is recommended to disable caching, so we choose the option NA.
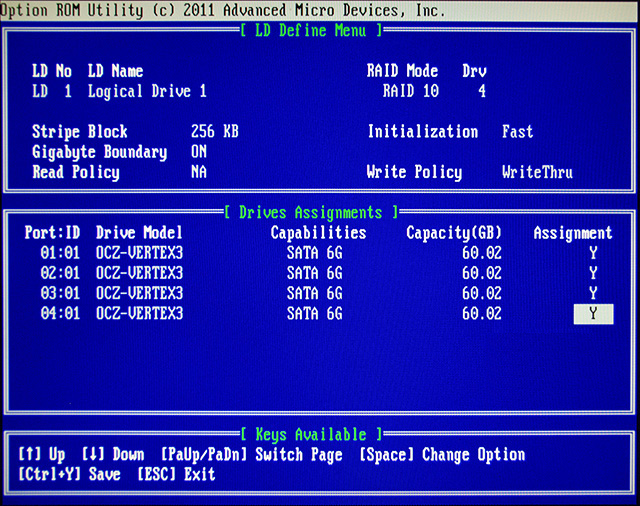
RAID 10 needs a minimum of four drives. After the turn, we go to each of the disks and change by space key to Y - from Yes :-). We save our newly created configuration of matrix by use of the Ctrl + Y.
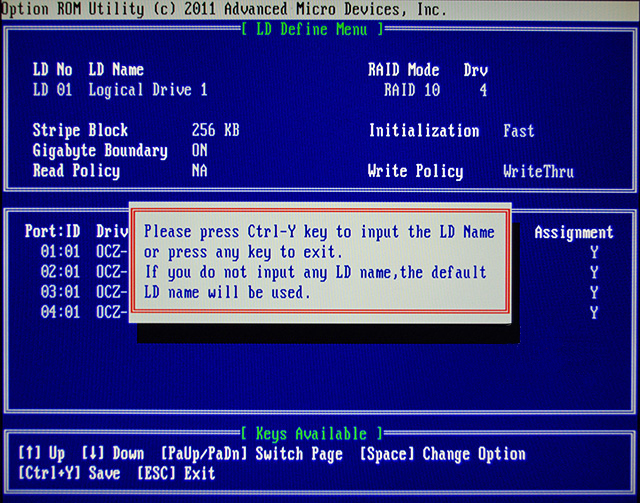
Pops up a message telling that we can again use the Ctrl + Y to enter to edit the name of the matrix, or by chose any key to skip this step and give for matrix the default name (Logical Drive number). We want to called our matrix, so we use combination of keys as above...
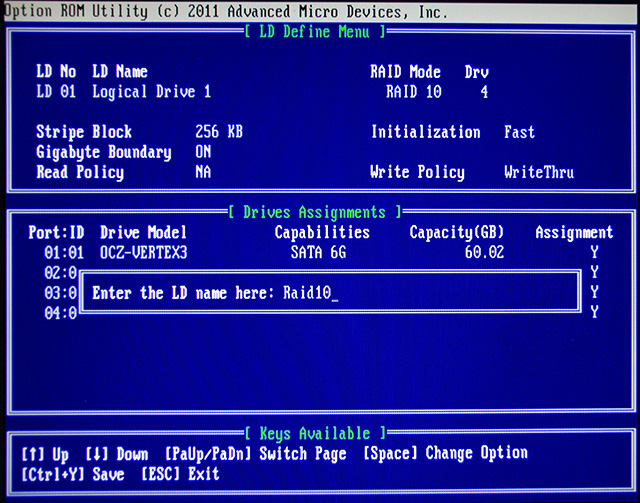
... give the name of our matrix. And press Enter.
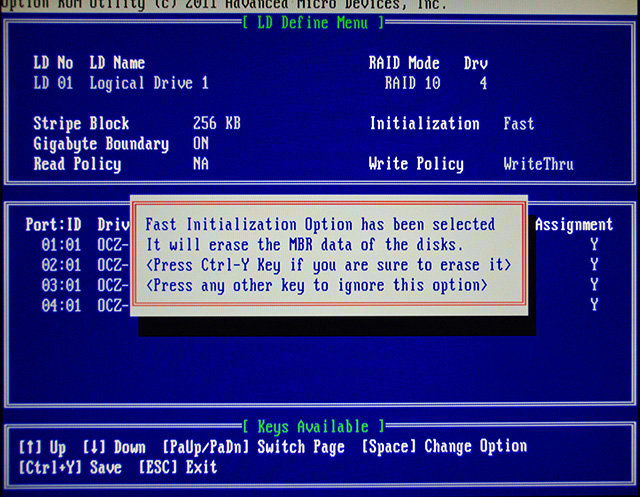
Anothermessage concerns the initialization. Again confirm with Ctrl + F. Pressing any key will cancel the creation of a matrix.
The next step is to set the size of the matrix. If you press any key will approve the maximum possible value, and the combination Ctrl + F will allow us to modify it. We use the whole space, so use any key.

And you're done. Our RAID 10 was created.
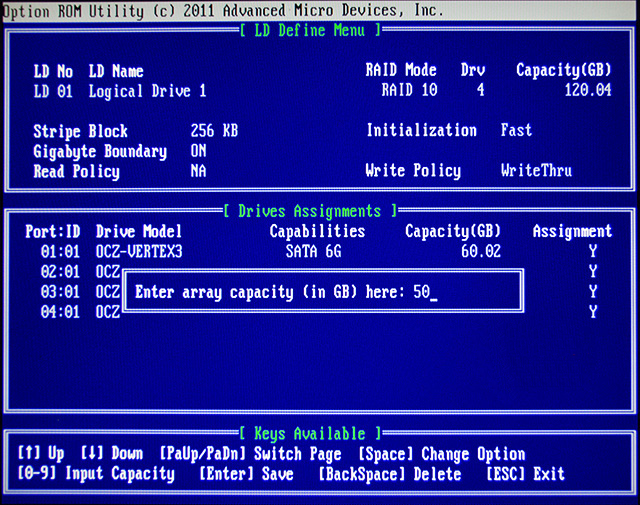
If you would like to create the connection (discussed on top of this page) RAID 0 and RAID 5 (recover RAID 5), in the step of setting the size of the matrix we would have to use Ctrl + F. In submenu settings of the size, enter the correct size and continue as before.
SB950 - Removing RAID
Removing the matrix with the use of utility is quite simple.
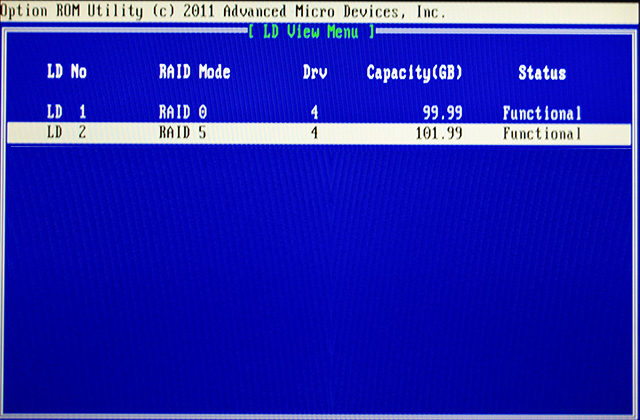
After created a RAID 0 at first with the reduced size to the 100GB on the same four SSDs also we have created a RAID 5 (this time leaving the step of set the size). The end result of such an operation can be seen in the above photo.
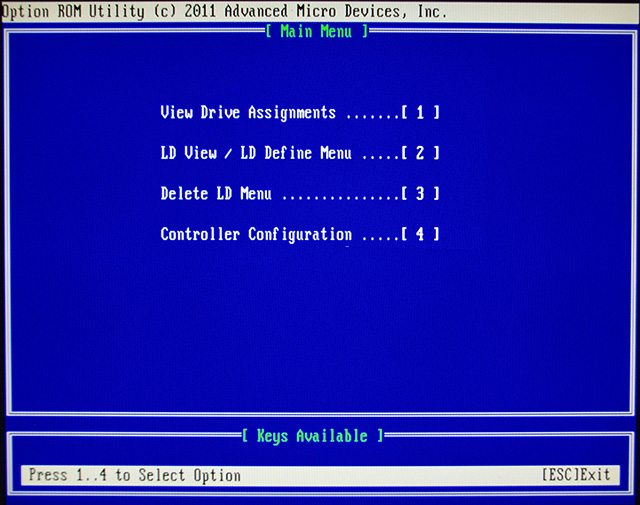
Select a submenu of removing the matrix by clicking 3
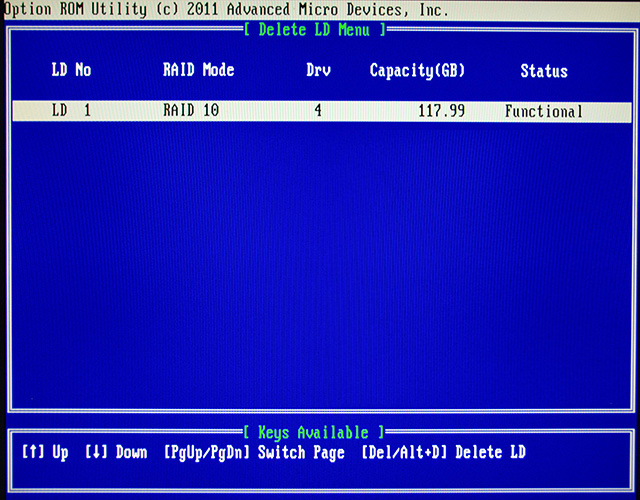
In an open submenu we will see our created matrix. Click on the Del or Alt + D to delete the selected matrix.
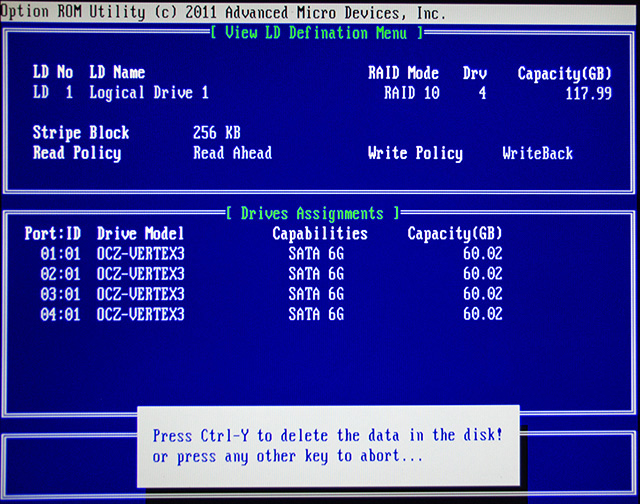
A window opens that describes all the properties of the matrix. And a window informing us that we need to confirm the deleting by combination Crtl + Y or discontinue by any key.
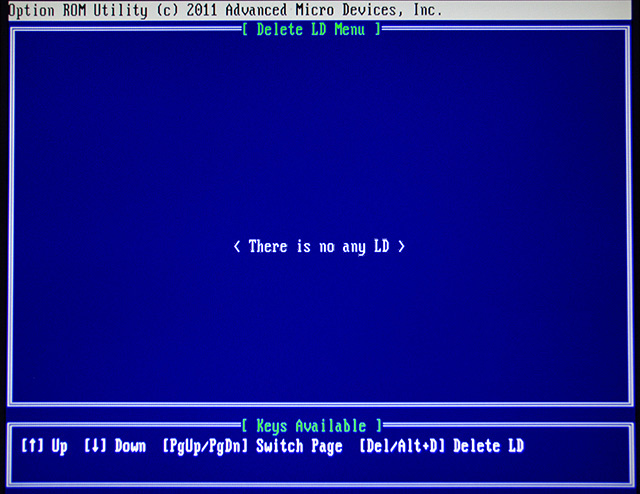
Done.The matrixwas removed.
SB950- ReportingRAIDfailure
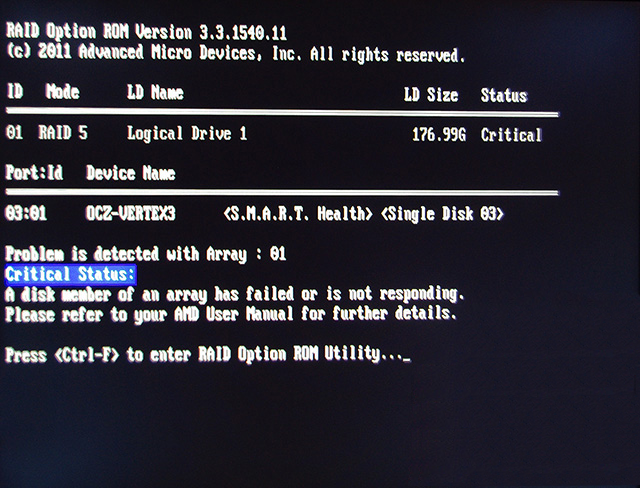
Defective matrices are reported in PC boot process. Just after the POST we will see the information as above.
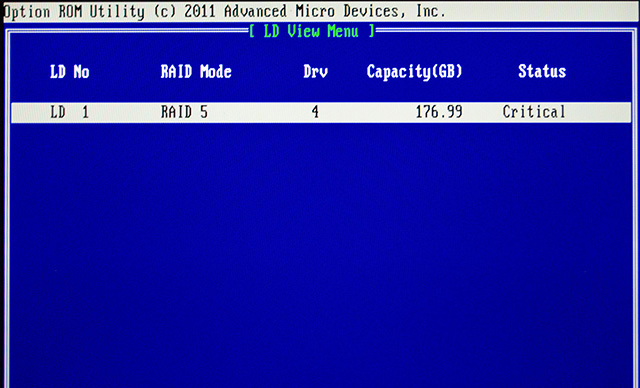
After enter into the Utility, and there into the submenu of the matrix preview, in turn, we see as above. Unfortunately, as we have said, from the Utility we can'trecovered the RAID.
