
Firstly I have a VMFS datastore hosted on a Nimble Storage array which is supporting a number of Guests... The datastore is esx-ds1
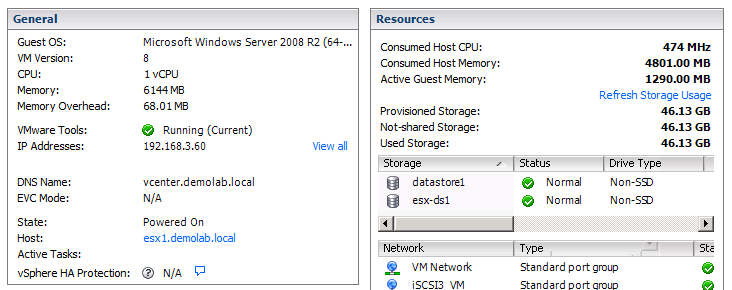
and that is hosted on my Nimble volume (esx-ds1):

The screenshot above shows the primary volume, it's size, it's I/O and note on the left handside this volume currently has 46 snapshots
In order for this demonstration I am going to delete a file from my vCenter server and then individually restore that file using a snapshot backup and clone.
Note: There is no prerequisite to use vCenter it just happens to be the host that I am deleting the file and where I have installed the UFS Explorer application.
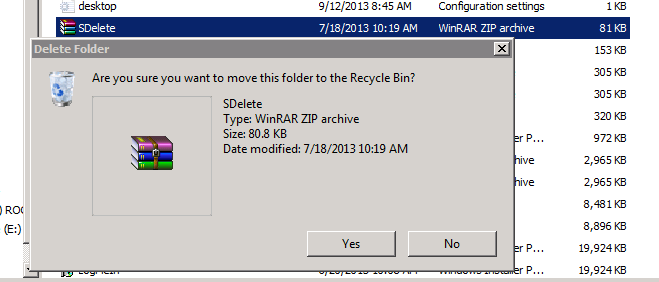
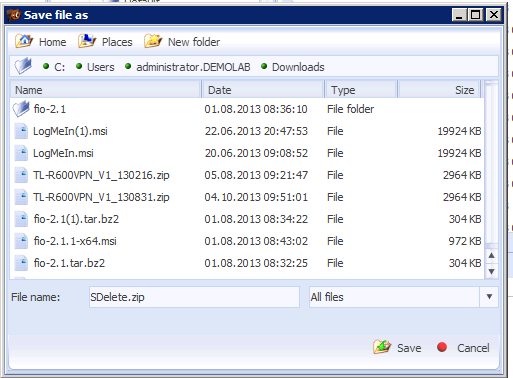
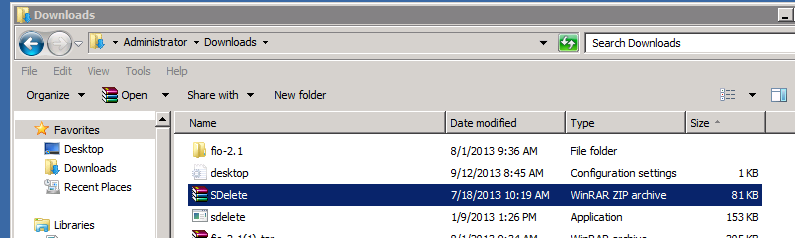
So now I am going to delete a file (SDelete.zip) to give us something to selectively restore...
If we now navigate to Snapshots tab of the esx-ds1 volume, we see a list of all the snapshots, including the time they were taken and the amount of space they currently consume. This particular volume is being backed up once every 2 hours and once a day with the daily snapshots being held for 30 days. I select the snapshot I wish to restore from (in this case a snapshot for a couple of days ago). At this point I could choose to unmount the datastore and restore the entire volume (which would restore, almost instantaneously, the volume to the point of time of the backup), however that doesn't make sense as all the VM's and Filesystems located on that datastore would be restored to that point of time and I only wish to restore the single file I deleted earlier. Instead I am going to create a Nimble clone from that snapshot. Again this is an instantaneous option as it's just a copy of metadata and will consume zero space. As a user the only thing I have to do if give the volume a unique name (RF-SingleFileRestore in this case) and click OK.

Once completed I have a new cloned volume that consumes no space, that s based on my chosen backup that I selected from the snapshot list...
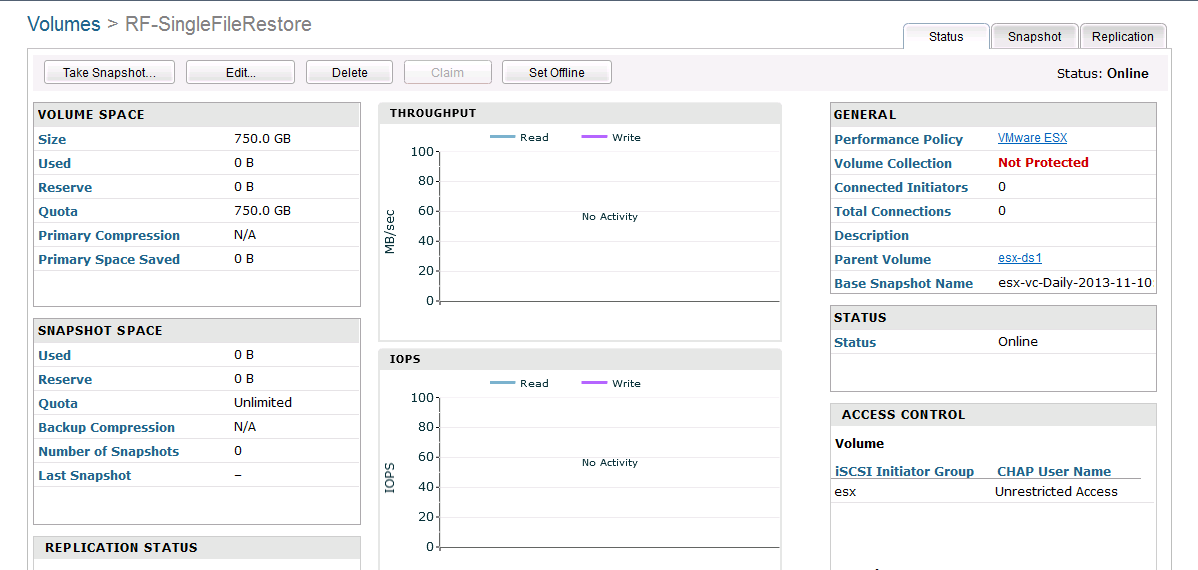
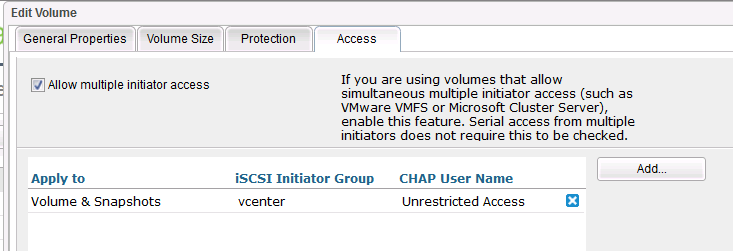
Note the space consumption and the parent/snapshot volume in the top right hand corner. As this clone is based of esx-ds1 the Nimble GUI has automatically given it access to my esx cluster (as that is where the parent was mounted to); So I am going to remap this clone to the host where I am going to run the restore from (my vCenter server for this demonstration). In order to do this I edit the volume and change the access control list to remove the ESX cluster and add my vCenter host.
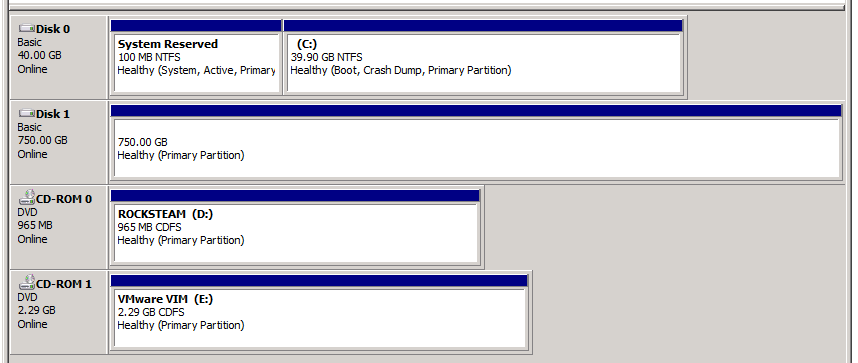
Now if I check the vCenter host software iSCSI initiator, I should be able to connect to the clone and see it from the Operating System....

and then see the volume is Disk Manager (Disk 1). Note: I don't want to format this volume and put NTFS on there as it's a VMFS volume and my backup data is already there. Just leave it as a Physical device.
So the above there has been a few steps to get us to this point, but I wanted the reader to be aware of the steps and what is going on with the snapshots and clones. The beauty is all the steps up to this point can be completely automated with a simple script to select a volume, snapshot, clone and mount.
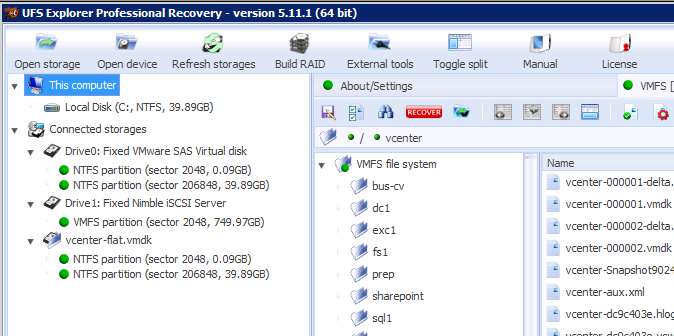
So final step is to utilise UFS Explorer to pull back the file... On starting UFS Explorer Professional Recovery, you will see all the drives that the host can see - it's C-Drive, VMDK and most importantly the clone that I mapped to my guest in the previous step....
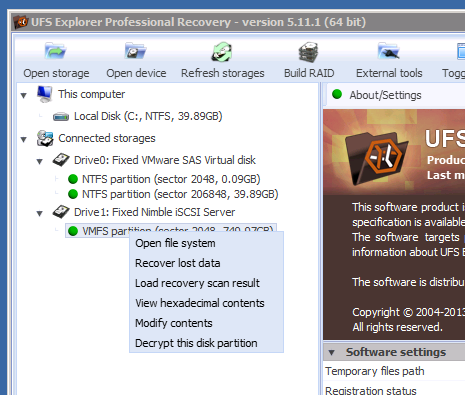
Selecting the clone and right clicking it will allow you to open and browse the VMFS filesystem....
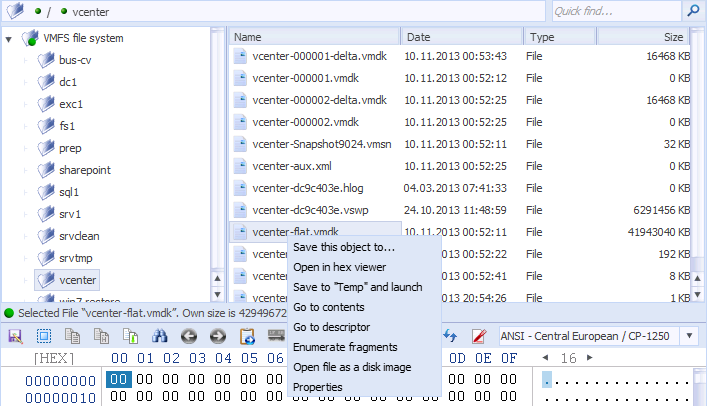
In the right hand pane, I will now see all my guests hosted on the datastore and I can drill into each one. Now I select the guest that I want to do my individual file restore from (my vCenter server in this example), clicking on vcenter will show me the guests VMWare files (vmdk's vmx files that are associated to the guest). Next I navigate to the guests vmdk and again right click the file and select Open file as a disk image. This will now open a new drive in my left hand pane which is that VMDK (vcenter-flat.vmdk):
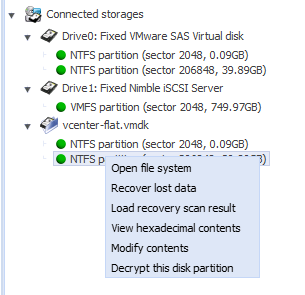
Now I can select that drive (Open the file system)
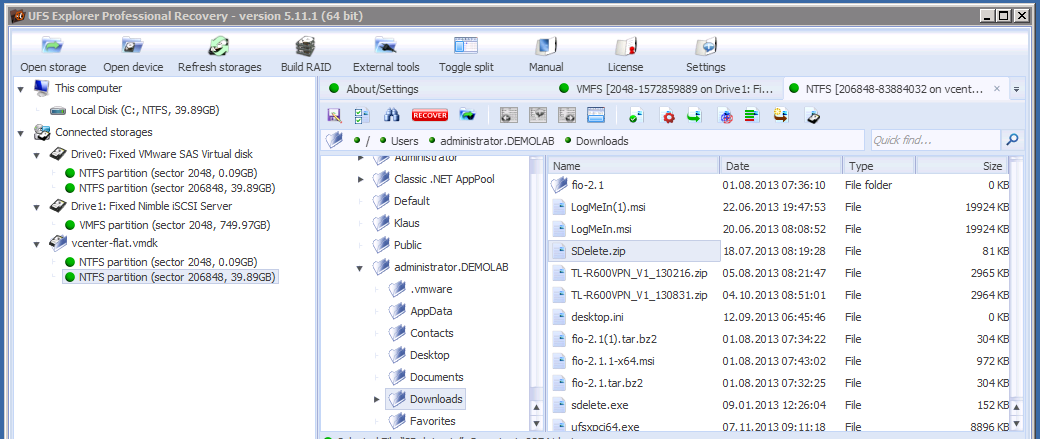
and navigate it finding the file I wish to restore (remember this is the guest's filesystem when the snapshot was taken). Apparently there is a function in UFS Explorer to scan and index the contents of the volume but I will save that for a future blog.
Once the file I wish to restore is located, you can right click it and 'Save this Object' back to the guest local filesystem..

Choosing the location where the object needs to be restored too...
and that's it - the file is back....
In order to clean up; Close the UFS Explorer application and Offline and delete the Clone Volume from the Nimble GUI.
Hopefully I will follow this blog up shortly with a single file restore for Exchange.
